Saturday, 31 March 2012

Exercise: Contrast and shadow fill.

Needed for this exercise are: a large white card and some tin foil to be used as reflectors.

" Set up a simple still life. Shoot from the same level as the subject with the camera on a tripod. Fix the light 2-3ft to one side at right angles to the cameras view. Take a number of photographs with and without a diffuser, at different distances, with white card and aluminium foil in different ways. Compare the results and then arrange them in order of contrast".

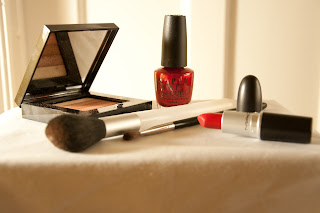
For this exercise I chose a selection of my make up to make a still life. I was pretty limited as to where I could shoot as the only place that has no light at all is my landing. I have tried to position it so that there was room at either side of the set for access. The background is actually my bedroom door as this was the only area I could shoot. The photos are all shot s 1/1.6 (this was actually determined by the camera) f5 ISO 400 40mm.

1. No diffuser.


2.With diffuser (greaseproof paper).


3. White card 1 metre away.


4. White card 0.5 metre away.


5. Aluminium foil reflector (dull side).


6. Aluminium foil reflector (shiny side).


7. Crumpled foil.


I then decided to experiment a little as I ordered a diffuser for the camera. Still keeping the arrangement the same I then used the built in flash to create the following effects. They were all shot 1/60 f5 ISO 400 40mm.

With built in flash.


Built in flash with diffuser.


Built in flash with yellow diffuser.


Built in flash with blue diffuser.


Conclusion.

The version that displays the highest contrast is the un diffused lamp example with no reflector. There is an obvious difference between this and the diffused example that did not have a reflected, with the shadows being much softer.
There was more of a difference between the white card and foil reflectors than I was expecting. Predictably, moving the reflectors closer to the still life or further away had a noticeable effect.
It was also interesting to see the effects created by the built in flash with variety of diffusers. Adding a diffuser really did have a big effect on the scene. I rather like the image created with the blue diffuser and had never thought of using coloured diffusers before.




Tuesday, 27 March 2012

Exercise: The lighting angle.

With the camera fixed on the tripod, we are to start with the light fitted with the diffuse at the same level as the camera and subject. Between each shot, move the light around the subject so that its is lit from various directions. State which you prefer and why.

1. From the front with the light next to the camera.


Not a particularly attractive photo, the light is too harsh being shone directly onto the subject.

2. From the side.


This makes the left side over exposed and the right under. If there had been more space to the left to move the light further away then I think the effect would of been much better.

3. From behind to one side.


This image almost looks as though the sun is shining from behind and illuminating the fruit.
4. Directly behind.


This positioning causes the viewer to mainly focus on shape.

5. Light pointing downward at 45 degrees, to one side.


This angle picks out different details on the fruit that  had not noticed with the previous light positions.
6.Light pointing downward at 45 degrees, pointing to the other side.


Similar to the above image.
7. Light pointing downward at 45 degrees, from behind.


Again focusing on shape as well as highlighting the edges.
8. Light pointing downward at 45 degrees, from in front.


You can actually see where the light was positioned as it has left a reflection on the fruit.

9. Directly overhead.


Still causing a bit too much reflection off the fruit.

10. Slightly in front.


Causes all of the fruit to be well lit.

11. Slightly behind.


Well lit but minimises the harshness of the lighting and reflecting from the light off the fruit.

 
Conclusion.
It has become quite apparent whilst working on this project how much altering the direction of lighting can really effect the image as a whole. Just by moving the light around slightly different areas of the subject can be highlighted.
I think that my favourite images are:
4. as it really focuses on the shape of the subject as a whole.
9. directly over head illuminates the whole subject.
11. as shooting for slightly behind highlights the edges well.

I am inclined to say that number 5 probably gives the best 3D effect in my opinion and reveal the form of the fruit still life better than the other images


Exercise: Softening the light.

"Set up a still life arrangement, with any object or group of objects. Using a diffused light source to soften the shadows and highligts take two photographs, one with just the naked lamp, the other with the translucent material held between the lamp and your subject."


Naked Lamp.


1/20 f7.1 ISO 400 40mm

Diffused.


1/13 f7.1 ISO 400 48mm


Conclusion.

The diffused example gives much softer shadows which appear less black than the example taken with the naked lamp. Even though the lamp was held in exactly the same place (or so I thought) the diffused image gives the impression of a longer shadow.  The course notes state that the exposure settings will be different but I have found them to be the same. I must try to work out why this is. The shot with the naked lamp has produced a shadow with a much sharper edge to it. The naked lamp example also appears to be more washed out where the light is hitting it, where as the diffused exmaple seems to retain the features better. I feel that the diffusion is an improvement as has created a better photo.


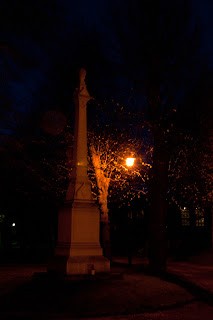
Exercise: Outdoors at night.

Preferably visit a city centre with brightly lit buildings and streets. Try to include:
  • a floodlit building.
  • a brightly lit store front.
  • a large interior with many people.
  • a raised view looking along a busy road.
I kept this exercise until last as I thought that I would probably find it the most problematic. For a start I do not live in a city so I visited a large town nearby. I was also a bit worried about wandering around in the dark with my camera and did not feel particularly safe. I did not take my tripod with me as I did not want to draw attention to myself and wanted to be able to move quickly if necessary. instead I relied on a high ISO setting. I aimed to shoot at dusk when there was still a bit of light in the sky so the buildings appeared clearer than if it had been completely dark, this ended up being between 8-9pm.

1.6s f25 ISO 1600 22mm -1.0 WB Auto.

The problem with this picture is that I arrived at the pedestrian overpass a little too early so the effect is not that good. It would have been a lot better if it had been darker and the road much busier. I took several pictures but this one came out the best. I would of liked the tail lights to have created longer streaks to create a more dramatic effect.


1/2 f18 ISO 1600 42mm -1.0 WB Auto

This was my first attempt in the town centre just outside the shopping centre. It is a bit blurred and out of focus I needed a slow shutter speed to allow light in but without the tripod I found it hard to keep the camera steady with my very unsteady hands!


1/3 f22 ISO 1600 18mm -1.0 WB Auto

The shopping centre was pretty much deserted by this time which was unfortunate as I needed many people but I have managed to produce a much clearer image this time.


1/3 f25 ISO 1600 30mm -1.0 WB Auto.

I love the deep blue of the sky on this shot. The focus is on the lighting under the roofing but then your gaze moves down the frame to the two people who are also looking up at it.


1/3 f16 ISO 1600 32mm -1.0 WB Auto

Another street scene.


1/3 f29 ISO 1600 40mm -1.0 WB Auto

This time a view of the multi storey car park with its fluorescent lights. I had tried to position the camera so that the cars were lit by edge lighting. this has worked quite well on the cars to the left of the frame nearest to the camera.


1/3 f14 ISO 1600 18mm -1.0 WB Auto.


1/3 f11 ISO 1600 30mm -1.0 WB Auto


1/3 f9 ISO 1600 21mm -1.0 WB Auto

This is actually one of my favourite photos of the night. I think that it could look a bit better composition wise but I love the colours and lighting effect.


1/3 f8 ISO 1600 32mm -1.0 WB Auto


1/3 f7.1 ISO 1600 24mm -1.0 WB Auto


1/3 f6.3 ISO 1600 18mm -1.0 WB Auto


I would never of photographed at night before, mainly because I always assumed that everything would come out so dark and dull looking but I actually really like the colour of the sky and artifical lighting and the effects that are created. With a bit of practice I think that I could get some really good images so will be heading out again.


Exercise: Tungsten and fluorescent lighting.


Compose a photograph in which both the interior lit by tungsten lamps and the exterior at dusk are both visible. Wait until the light levels inside and outside are approximately equal and take three photos: one set to Auto, one with the balance set to daylight and the other with the balance set to tungsten.

For the second part of the project find two different interiors lit by fluorescent lamps. If possible make one of these an interior lit by small CFL lamps. Take two or three photos identically composed in each location. The first set to Auto the second fluorescent and the third to an alternative fluorescent if possible.

Before I took any photographs I followed the instructions for looking at the different colour temperatures of the daylight and the room (tungsten) light. The light outside appears to have more of a blueish tone where as the indoor light seems quite yellow.

Part 1.


1/25 f3.5 18mm WB AUTO.


1/25 F3.5 18mm WB daylight.

1/25 f3.5 18mm WB tungsten.

I actually think that the Auto white balance has done a good job here and shows the room looking as close in colour to how I remember. The daylight WB seems to show the room looking too warm and yellow in colour where as the tungsten WB gives it too much of a blue tone. Looking at the outside through he window the daylight WB  makes it look more realistic as both the other options make it look very blue. I think that it is more acceptable for the outside to appear blue at dusk than then indoors to look unrealistic in colour.

Part 2.


1/80 f5 ISO 200 52mm WB AUTO


1/80 f5 ISO 200 52mm WB fluorescent


1/80 f5 ISO 200 38mm WB AUTO

1/80 f5 ISO 200 38mm WB fluorescent

The only fluorescent lighting available to me is at work so I took my camera there to experiment. Ideally I would of liked the background to of been pale but its quite a pale blue. The examples shot with the auto WB produce images closer to the real colours. The fluorescent WB makes the background considerably more blue and is not at all an accurate representation of the true colour showing that fluorescent lamps do not emit a full colour spectrum.


Exercise: Cloudy weather and rain.

For part one photograph the same view in sunlight and under cloud. Choose two or three different subjects.
For part two take three photos outdoors, on an overcast day, that make good use of the enveloping, shadowless light.

For the third part of the exercise rain is needed.

Part one.

Sunlight.


1/1000 f4.5 ISO 200 40 mm -1.3 WB sunlight

Under cloud.


1/250 f4.8 ISO 200 48mm +1.3 WB sunlight


Sunlight.


1/1000 f3.8 ISO 200 24mm -0.7 WB sunlight.

Under cloud.


1/2500 f3.8 ISO 200 24mm -0.7 WB sunlight.


Sunlight.


1/1000 f3.5 ISO 200 18mm -1.3 WB sunlight

Under cloud.


1/2000 f3.5 ISO 200 18mm -0.3 WB sunlight.


The photos of my house and of the tree show no difference in f-stops but the photo of the tulip has a very slight difference with the sunlight shot being 4.5 where as the under cloud shot is 4.8. The under cloud images also have a slightly blue tinge to them although this is not as evident in the tulip shot. the under cloud images are also more evenly lit than the sunlight images as the shadows are much softer and they have a flatter look to them.

Part 2.

Three photos on an overcast day.


1/125 f3.5 ISO 200 18mm


1/60 f4.5 ISO 250 35mm


1/60 f5.6 ISO 250 105mm


With these images being shot on an overcast day, it shows off the subject in a more attractive way. The shots of the trees would appear to have a lot less texture if they had been shot on a bright day, and the bright yellow of the pansy would instead look washed out, with the leaves appearing less lush.


Part 3.

Rainy day.


1/100 f5.6 ISO 200 105mm


1/160 f3.8 ISO 200 22mm


1/80 f5 ISO 200 52mm


1/80 f5.6 ISO 200 105mm

I have always avoided photographing in the rain as I guess I have always felt the weather is too dark and gloomy and that the images would come out rather dull looking. I have never thought of the effects that can be created by the rain. My favourite images here are the rain glistening on the bottles and how the water droplets appear on the leaves. The leaves seem much glossier when wet from the rain. I think that I will actually consider shooting in these conditions as I rather like the effects created. Its just a shame that I was unable to photograph a rainbow.